
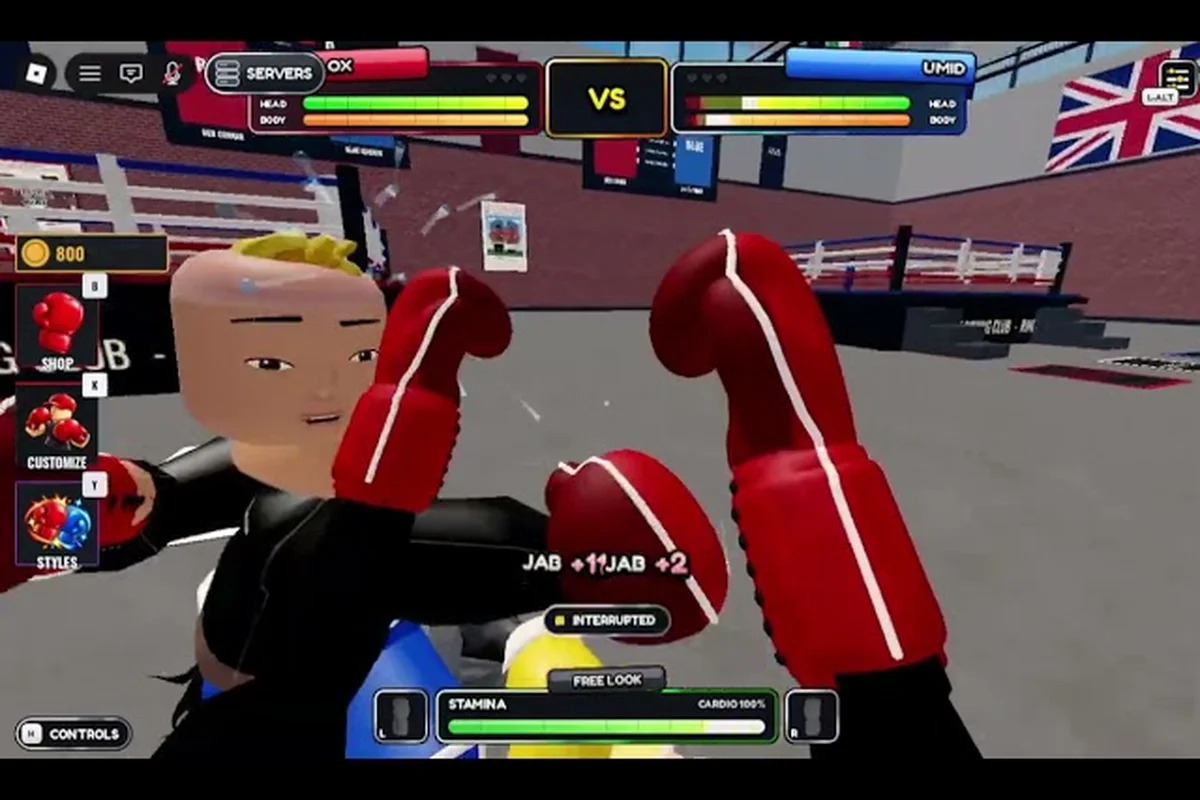
This First Person Boxing advanced guide is written for players who already win rounds and want to win them on purpose rather than on reflexes. Once the basics are automatic, progress stops coming from learning new buttons and starts coming from layering the five published mechanics — punches, slips, head and body guards, counters, and the stamina pool — so that each one covers the weakness of the next.
The sections below rebuild that layer structure from the ground up: how punch chains are sequenced to force a reaction, how head and body guards split the defensive job, how slips open the counter window, and how stamina discipline decides which exchanges you can afford to take. Each idea is paired with a drill you can run in the AI practice mode before you risk it in a real lobby.
The Five Core Mechanics, Re-Read at a High Level
Most players who reach the top of a First Person Boxing lobby stop thinking about single buttons and start thinking about a small, repeating loop. The official page for the experience spells out the system you can build that loop on: punches, slips, guards split between a head guard and a body guard, counters that can end a round in a single exchange, and a stamina pool that slows you down when it empties. Cinematic knockdowns and replays sit on top of all of that, but they are the Payoff, not the system you have to design. A complete advanced guide for this game is really a guide to those five mechanics, layered correctly.
The first-person view is the silent sixth mechanic. It changes the geometry of every fight because the camera sits behind the lead shoulder, the depth cues are slightly off, and the opponent's torso looks smaller than it does in a third-person boxing sim. The first job of any advanced player is to compensate for that view, not to fight against it. Once you accept the perspective, the same five mechanics start to chain in ways a beginner never sees.
| Mechanic | What the official description says | What it looks like at an advanced level |
|---|---|---|
| Punches | A core offensive input, with a stamina cost | Pressure tool, not a damage tool — used to force reactions |
| Slips | A core defensive input that moves your head offline | Sets up counters and breaks the opponent's rhythm |
| Guards (head / body) | Two guard heights named separately | Decision per exchange, not a default stance |
| Counters | A core input that can produce a knockout | Window after a slip, your highest-impact action |
| Stamina pool | A resource that slows you down when it empties | The hidden clock every round runs on |
The advanced reframe is short: punches buy you information, slips buy you time, guards buy you safety, counters buy you rounds, and stamina is the only currency you cannot recharge mid-fight. Every section of this advanced guide is built around that loop.
Combo Architecture: Designing Punch Chains That Win Rounds
A real combo in First Person Boxing is not a sequence of identical inputs. It is a chain of different roles — range-finder, disruption, finisher — that changes the opponent's decision tree on every beat. Because the official description names only the broad inputs and not their internal timing, the advanced player has to construct chains from observation in the practice mode and from watching how stamina behaves late in a round.
The simplest high-level chain is range-finder → disruption → slip → counter. Throw the lead hand to measure distance and force a reaction. Throw a second, different punch into the guard height the opponent is not holding. Slip offline the moment they try to answer, then fire the counter while their weight is still loaded on the wrong foot. This is the only chain you need to drill until it becomes reflex, because every other advanced chain is a variation on it.
Two-Chain Combos for Stamina-Efficient Pressure
A two-input chain is what you reach for when your stamina is mid-pool and you do not want to throw a third commitment. The most reliable variant is a lead-hand touch into a rear-hand finish. The first input forces the opponent to react at long range; the second lands at the perfect distance because the first one already proved the range. Because the two inputs are different, the opponent's guard-height read breaks down — they commit to one height for the first punch and cannot switch fast enough for the second.
| Chain | Role of input #1 | Role of input #2 | Best moment in the round |
|---|---|---|---|
| Lead touch → rear finish | Measures range, baits guard | Lands at confirmed distance | Round start (0:00 – 0:30) |
| Body touch → head finish | Pulls guard low, opens head | Lands over the dropped guard | Mid-round (0:30 – 1:30) |
| High hold-back → body finish | Forces head guard, exposes body | Lands around the high guard | End of round (1:30 – end) |
| Rear commitment → lead counter | Fakes power, opens counter window | Counters their reload | When stamina is low |
The advanced player does not memorize four chains. They memorize one shape — input of one role, then input of a different role — and apply it to whatever the opponent is doing. The chain is a template, not a script.
Three- and Four-Chain Combos for Opponents Who Have Read You
Once a defender starts timing your two-chains, the third and fourth inputs exist to break their timing. A three-chain typically adds a deliberate mislead punch before the disruption punch. A common advanced variant is a light lead hand, a pause, then a body punch, then a head counter. The pause is the most important input. It trains your opponent to expect the second punch immediately, so when you hold the pause a half-beat longer, their guard height drops late and your counter lands clean.
A four-chain is reserved for opponents who have fully adapted to your three-chain. Adding a fourth input mid-round is costly because of the stamina cost, so the advanced rule is: never throw a four-chain unless you have already landed a three-chain in the same round. If you have not landed a three-chain, the opponent has not earned the privilege of seeing the fourth input.
| Chain length | When to deploy | What it costs | What it buys |
|---|---|---|---|
| 2-chain | Default pressure | Low stamina | Confirms range and guard height |
| 3-chain | After a landed 2-chain | Medium stamina | Breaks the opponent's timing |
| 4-chain | Only after a landed 3-chain | High stamina | Wins the round outright |
The Defensive Layer: Guards, Slips, and the Counter Triangle
Defense in First Person Boxing is not a single button. It is a triangle of three different inputs — head guard, body guard, and slip — and the advanced player picks a different vertex on every exchange. The official description explicitly separates the head guard from the body guard, which means the game rewards you for choosing a height per punch, not for parking at one height and hoping.
The first rule of the triangle is that guards and slips are not interchangeable. A guard absorbs an incoming punch and keeps you planted; a slip moves your head and gives you a counter window. The second rule is that slipping into a punch is worse than slipping before a punch, because the slip is the setup for the counter, not the answer to the punch. The third rule is that the counter window is short — once your opponent has reset their stance, the slip has done its job and you should be back in a guard, not chasing.
When to Guard High vs Low
Guarding at the wrong height is one of the most common ways high-ranked players lose rounds they should be winning. The general rule is: match your guard to the punch they are most likely to throw next, not the punch they just threw. A defender who just blocked a head punch will instinctively hold the head guard — that is the moment to switch low, because the next punch in their rhythm is usually the body. The table below maps common opponent rhythms to the guard the advanced player should hold.
| Opponent just threw | Their next most likely punch | Guard you should hold |
|---|---|---|
| Head punch | Body punch (rebound) | Body guard |
| Body punch | Head punch (rebound) | Head guard |
| Counter attempt | Long-range lead hand | High guard, ready to slip |
| Nothing (idle) | Lead-hand range-finder | High guard with slip pre-loaded |
When to Slip Instead of Block
Slipping is the more aggressive choice because it commits your character to a counter follow-up. The advanced rule is to slip when the opponent has already committed to a power punch — you can read this from their stance shift in first-person view — and to block when you are not sure. Slipping a jab is almost always a mistake, because the jab is a setup punch and your slip has no clean counter to follow. Slipping a loaded rear hand, by contrast, is the highest-percentage counter-opener in the game.
Reading the Matchup: Stamina, Telegraphs, and Tells
Every round in First Person Boxing is decided by what you can read before the punch lands. The official description does not publish stamina numbers or counter window lengths, so the advanced player has to build their own read from the visible bar, the camera, and the opponent's movement. The stamina bar is the only public number on the screen, and it is the most important read you can make.
The single most important stamina read is who is emptying faster. Whichever player empties first loses the exchange, because the slow state described on the official page applies the moment the bar hits zero. The advanced player does not track their own stamina reactively — they watch the opponent's bar and adjust their pace to make the opponent empty first. If your bar is at 60% and theirs is at 30%, you can afford to throw a heavy chain. If your bar is at 30% and theirs is at 60%, you should be defending and counter-only until the gap closes.
| Stamina read | Your response | Why |
|---|---|---|
| You high, opponent high | Trade single inputs, no chains | Both players can still swing, no edge |
| You high, opponent low | Apply 2- and 3-chains | They cannot afford to swing back at full speed |
| You low, opponent high | Counter-only, no initiations | They have the resource edge, do not feed it |
| Both low | Pressure with 2-chains, do not over-commit | Whoever lands first usually wins the round |
Telegraphs You Can Read in First-Person View
First-person telegraphs are different from third-person telegraphs. In third-person boxing games you read shoulders, hips, and rear foot load. In first-person you read the opponent's head height, the visible portion of their lead shoulder, and the small camera dip they take before committing to a body punch. The advanced player builds a small library of these reads and applies them per opponent.
-
Head dips before body punches. A small downward head movement usually precedes a body commitment. The counter is a head guard into a slip-and-counter, because the body punch is already committed.
-
Lead-shoulder roll before rear hands. When the lead shoulder visibly rolls forward, the rear hand is loading. The counter is a high guard into a slip offline.
-
Stance width before power punches. A wider stance means a planted power shot is coming. The counter is a step-back, not a block, because planted power shots do significant stamina damage through a static guard.
-
Idle weight shift before lead hands. A subtle weight shift onto the rear foot usually precedes the lead hand. The counter is a high guard pre-loaded before the punch arrives.
Round Pacing: How to Spend the Clock
Rounds in First Person Boxing are short and unforgiving. The advanced player does not fight the same way at the start of the round as at the end, because the stamina economy and the opponent's read of you have both shifted. A clean round has three phases, and each phase has a different job, and recognizing how those phases chain together is also what separates a fighter who stays standing from one who ends up flat on the canvas — for a closer look at surviving and reversing those desperate late-round knockdown moments, see our First Person Boxing Knockdown Tips.
Phase 1 — Information (0:00 – 0:30)
The first thirty seconds of a round exist to gather data, not to deal damage. Throw single inputs, watch the opponent's guard choices, watch their stamina bar, and identify the one chain they cannot defend. The advanced player will usually land one or two clean inputs in this phase but will not commit to any chain longer than two inputs. The job of phase 1 is to leave the round with one confirmed read.
Phase 2 — Pressure (0:30 – 1:30)
Once you have your read, phase 2 is where you apply it. Throw the chain that the opponent cannot defend, watch their stamina bar drop, and do not over-commit. If the read is wrong, return to phase 1 immediately. The most common advanced mistake is to assume a read is correct after one landed input — the read has to survive two more exchanges before it is reliable.
Phase 3 — Close (1:30 – End)
The final thirty seconds of a round is where the stamina economy usually decides the fight. If you are ahead on stamina, this is the time to apply your longest confirmed chain and look for the counter KO. If you are behind on stamina, this is the time to play counter-only and let the opponent empty their own bar. Do not initiate a four-chain in this phase unless you have already landed it earlier in the round.
| Phase | Stamina target | Chain length | Goal |
|---|---|---|---|
| 0:00 – 0:30 | Hold above 80% | 1- and 2-chains | Confirm one read |
| 0:30 – 1:30 | Hold above 50% | 2- and 3-chains | Apply the confirmed read |
| 1:30 – End | Finish above the opponent | Counter-only or 4-chain | Land the KO or run the clock |
Ranked Mode and What Advanced Players Should Know
The game has a confirmed ranked mode — the official event is titled RANKED + BUG FIX! with the subtitle New ranked mode!, hosted by the developer group Can You Box?. Beyond that confirmed existence, the developers have not published any details about how ranked mode works internally. There are no published rank tier names, no published rating algorithm, no published placement rule, and no published season or reset structure. Advanced players should treat ranked mode as a confirmed feature without treating any specific ranking detail as a fact.
The practical consequence is that the only reliable advanced strategy in ranked is the same one that wins in unranked PvP: clean combos, layered defense, and stamina discipline. Any player who claims to know the ranked formula, the tier list, or the reset date is repeating an unverified claim. The advanced approach is to assume the system rewards the same things PvP rewards — winning rounds — and to play accordingly.
| Ranked claim status | What the official page says | What you should do |
|---|---|---|
| Ranked mode exists | Confirmed via the event page | Queue into ranked when you are ready |
| Rank tier names | Not published | Do not chase a tier name you cannot verify |
| Rating algorithm | Not published | Do not optimize for a formula that is not public |
| Season / reset | Not published | Do not plan around an unconfirmed reset |
| Placement matches | Not published | Treat your first ranked matches as data, not destiny |
Camera, Depth, and First-Person Geometry
The camera in First Person Boxing is not a neutral observer. It sits behind your lead shoulder, slightly off-center, and it distorts two things every advanced player has to learn to compensate for: depth and opponent size. A punch that looks like it will land at the visual edge of the screen will actually miss, because the camera's near-clip plane sits inside your own fist. A punch that looks too close to throw will land cleanly, because the camera sits further from your fist than it appears.
The single most important camera compensation is to calibrate range in practice mode before you trust it in PvP. Throw ten light punches at the AI in practice, note where each one lands relative to the visual edge of the screen, and lock that distance in as your real range. The advanced player will redo this calibration every few sessions because the camera angle and depth cues can shift slightly between matches.
A second camera read is opponent size. In first-person view, the opponent's torso reads smaller than it is, which tempts beginners to throw at ranges that are actually inside the opponent's reach. The fix is to commit to the chain at the calibrated range, not at the visual range. The table below is a starting calibration you can verify against your own practice rounds.
| Visual range impression | Actual hit range | Punch to throw |
|---|---|---|
| Punch looks short, will miss | Clean lead-hand range | Throw the lead hand |
| Punch looks exactly right | Slightly short, will miss | Step in, then throw |
| Punch looks slightly long | Perfect distance for rear hand | Throw the rear hand |
| Punch looks way too far | Inside counter range, not punch range | Slip, then counter |
Practice Mode as an Advanced Training Tool
The official description names two ways to fight: against other players and against AI in practice. For the advanced player, practice mode is not a warm-up — it is the only place in the game where you can lose a round on purpose and learn from it. The AI in practice mode lets you test chain lengths, test guard switches, and test stamina pacing without a rank cost. The advanced player will spend the first five minutes of every session in practice, not PvP.
A clean practice session has three drills. First, throw ten of your two-chain at the AI and count the lands. Second, hold the body guard for one round and the head guard for the next, and note which one the AI punishes more. Third, empty your stamina bar on purpose and observe exactly when the slow state kicks in, so you have a body-memory of the threshold before it happens in a real round. These three drills take under ten minutes and reset your reads for the day.
| Drill | What it trains | Time cost |
|---|---|---|
| Two-chain count | Confirms your current chain reliability | 2–3 minutes |
| Guard-height switch | Reveals which height the AI punishes | 3–4 minutes |
| Empty-stamina test | Locks the slow-state threshold in muscle memory | 2–3 minutes |
Match Formats and Where to Spend Your Time
The official page confirms two practice formats — PvP and AI practice — and a confirmed ranked mode event. There is no confirmed free-for-all, no confirmed private lobby system, and no confirmed training mode beyond AI practice. The advanced player should spend time accordingly: the majority of training in practice mode against the AI, the majority of skill testing in unranked PvP, and the ranked mode reserved for sessions where the fundamentals are already clean.
The other decision is platform. First Person Boxing runs on PC, mobile, and console, and the depth-cue calibration is slightly different on each. A PC player on a large monitor will see depth more accurately than a mobile player on a small screen, which means the same chain can land at slightly different visual ranges. The advanced player calibrates on the device they actually play on, not on the device they wish they played on.
| Format | Best use for an advanced player | Frequency |
|---|---|---|
| AI practice | Calibration, chain drills, stamina tests | Every session, first 5–10 minutes |
| Unranked PvP | Skill testing, read building, new chains | Majority of session time |
| Ranked mode | Application of clean fundamentals | When fundamentals are stable that day |
Building a Session Plan That Holds Up
A common advanced mistake is to load into PvP without a plan and hope reads appear. They will, but they will appear too late. The clean approach is a short, repeatable session plan that front-loads the boring work in practice mode and reserves PvP for application. The plan below is a starting point — advanced players will tune it to their own stamina and chain preferences.
-
Minutes 0–3: Two-chain drill in practice mode, count lands.
-
Minutes 3–6: Guard-height drill, body guard one round, head guard the next.
-
Minutes 6–10: Stamina-empty drill, observe the slow-state threshold.
-
Minutes 10–25: Unranked PvP, one confirmed read per round.
-
Minutes 25–30: Optional ranked queue, only if the PvP reads are clean.
A session plan does not need to be complex. It needs to be the same every time, so the variables you are actually testing are the opponent's reads, not your own preparation. Consistency in the plan is what lets the advanced player actually tell when they are improving.
Frequently Asked Questions
What is the most important advanced tip in First Person Boxing?
The single highest-leverage habit is to match your guard to the next punch, not the last one. Most players hold the height they just blocked, which is exactly the height the opponent is about to leave. Switching guard height on every exchange is the cheapest, most repeatable advanced read in the game and it sets up every counter that follows.
How do I land more counters in this game?
Counters come from slips, and slips come from committed power punches from the opponent. The setup is: hold a high guard, wait for the rear hand to load, then slip offline the moment the rear shoulder rolls. The counter window is short, so you should be pre-loading the counter input during the slip rather than after it. The full advanced guide loop is slip-during-load, counter-during-recovery.
Should I queue into ranked mode as soon as I unlock it?
Only after a clean unranked PvP session where you landed your two-chain reliably and held your stamina above the opponent in the final thirty seconds. Ranked mode is a confirmed feature but the developers have not published the ranking formula, so the safest strategy is to play it with the same fundamentals that win unranked rounds.
How do I counter an opponent who keeps slipping my punches?
Switch from power punches to body punches, because a slip moves the head offline the body line. The chain is high-fake into body — the opponent slips the high fake and walks into the body input. This is a standard three-chain in the advanced playbook and it is the cleanest answer to a slippery defender.
Why does my character suddenly feel slow in the middle of a round?
The official page confirms the stamina pool slows you down when it empties. The fix is to track your stamina bar in real time and shorten your chains when you cross the halfway mark. If you are already feeling slow, stop initiating chains entirely and play counter-only until the round ends or your stamina recovers above the opponent's.