
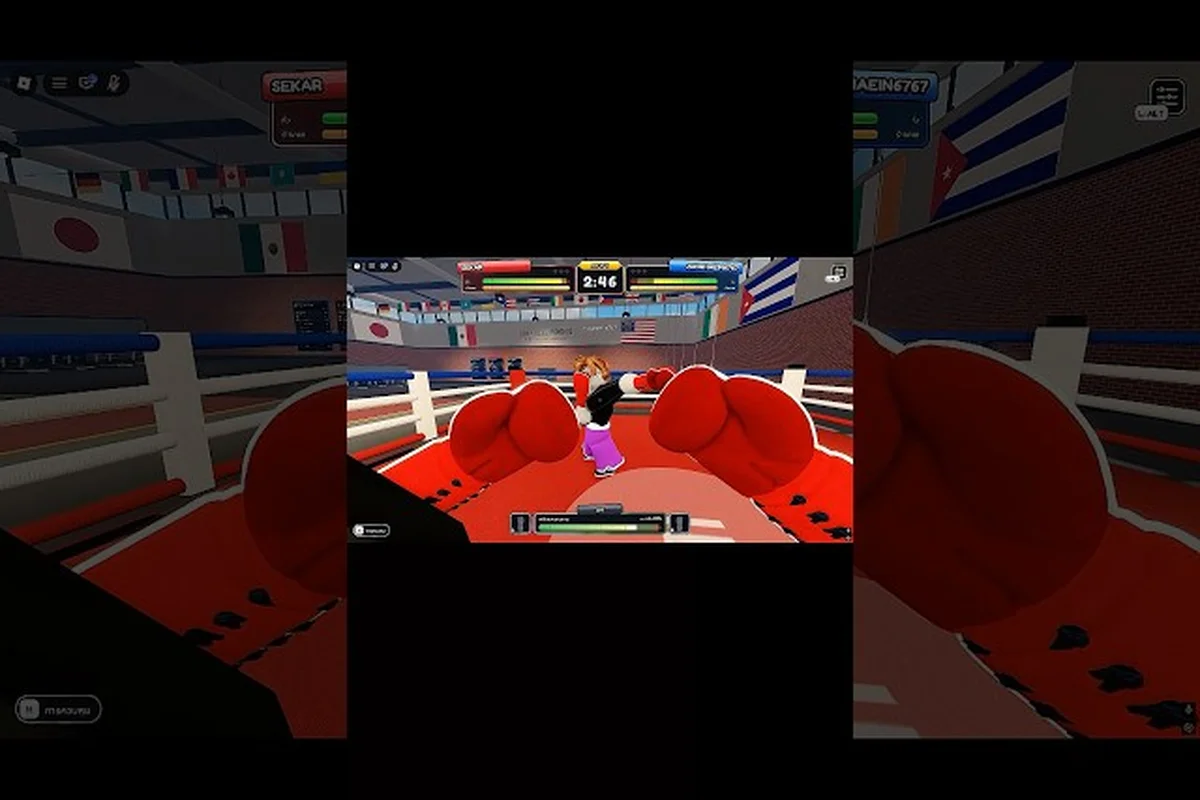
The boxing straight punch is the backbone of every fight in this Roblox experience, and learning to chain it with a stable guard and disciplined footwork separates spammers from real winners. Published by the group Can You Box? and running on PC, mobile, and console, the game names five core mechanics in its official description: punches, slips, guards split into a head guard and a body guard, counters that can produce a knockout, and a stamina pool that slows you down when it empties. This guide focuses on the straight punch specifically — what role it plays, how to weave it into clean two- and three-hit combinations, which guard stance keeps you safe while you throw it, and the footwork drills that keep your jab and cross landing on target. Every recommendation here is built from official mechanic descriptions and the practical patterns reported by players since the title launched on 28 September 2026.
Straight Punch Mechanics in First Person Boxing
The straight punch travels along the shortest line from your fist to your opponent's guard, which is exactly why it is the highest-percentage tool in the game. According to the official description, punches are one of five named mechanics, sitting alongside slips, head/body guards, counters, and the stamina pool. The straight punch is not a single input — in practice it covers two distinct punches that share the same trajectory: the lead-hand jab and the rear-hand cross.
Jab vs Cross: Roles in the Straight Punch Family
Even though both punches travel on a straight line, they do very different jobs inside a round. The jab is faster and lower-cost, which makes it the preferred range-finder, the setup punch, and the reset tool. The cross carries more weight and lands behind the jab, but it drains your stamina faster and leaves a longer recovery if it misses.
| Attribute | Jab (Lead-Hand Straight) | Cross (Rear-Hand Straight) |
|---|---|---|
| Speed | Fast | Moderate |
| Stamina Cost | Low | Higher |
| Primary Role | Range-finding, setup, disruption | Damage, counter-punch finisher |
| Best Range | Just outside opponent's fist | Inside opponent's jab range |
| Recovery on Miss | Short | Long |
| Typical Combo Position | 1st or 2nd punch in a string | 2nd or 3rd punch, often the finisher |
Players report that the most common mistake is treating the jab and cross as interchangeable. They are not. A round built entirely on crosses drains the stamina pool quickly, because every cross spends more of the meter than a jab does, and once that pool is empty the official description notes you slow down — which means your own straight punch loses speed at the worst possible time. Spacing your jabs between crosses keeps the meter healthier and lets the second straight punch in a string land harder.
Why the Straight Punch Is the First Combo to Master
The official mechanic list is small and tightly focused, which means every tool in First Person Boxing has to do real work. The straight punch is the only offensive tool that scales cleanly into a counter — when an opponent overcommits, a straight punch meeting their incoming hand is one of the inputs that the official description ties to producing a knockout. The hook and uppercut-style swings have their place, but they require openings that the straight punch itself creates.
A second reason to prioritize it: the straight punch pairs naturally with the slip mechanic. Slipping moves your head off the center line, and the first punch you can throw after a slip is almost always a straight one, because the angle you create with the slip lines up perfectly with the rear-hand cross. This is the same logic a real boxer uses to time a counter cross, just compressed into a first-person view where the camera and the punch share the same forward axis.
Building Straight Punch Combos
Boxing combination punching in this title is not about mashing every input as fast as possible. The combos that work are short, rhythmic, and built on the straight punch because the straight punch is the only punch that recovers fast enough to chain three or four times in a row before the stamina pool starts complaining. The game's small mechanic list rewards players who treat every string as a setup for a counter opportunity.
Core Two- and Three-Punch Combos
Start with the shortest reliable strings and only extend them once the shorter ones land cleanly. Most players report that the first combo they can throw on reaction, rather than from memory, is a 1-2 (jab-cross), and that this alone wins a surprising number of practice-mode rounds.
| Combo String | Pattern | Best Use Case | Risk Level |
|---|---|---|---|
| 1-2 | Jab → Cross | Standard opener, range-finding | Low |
| 1-1-2 | Jab → Jab → Cross | Beats opponents who try to parry the first jab | Low-Medium |
| 2-1-2 | Cross → Jab → Cross | Counter string after slipping an opener | Medium |
| 1-2-1 | Jab → Cross → Jab | Disengage string, used to back off safely | Low |
The 1-2 is the foundational straight punch combo. It is fast, it costs relatively little stamina, and it teaches timing because if the cross is thrown before the jab has even touched the opponent, the cross arrives into a still-raised guard. The 1-1-2 adds a second jab specifically because some players instinctively react to the first one — a patient second jab is what cracks that habit open.
Boxing Combo Building Through Layered Pressure
Boxing combo building is less about memorizing long strings and more about layering pressure in waves. A single 1-2 is a wave. A 1-1-2 right behind it is a second wave that lands before the opponent has reset their guard. The 2-1-2 only works after a slip, because the rear-hand cross is the punch that punishes an opponent who has just missed, and a forward-moving cross into a still-extended opponent is what the official counter description points at.
The fourth row in the table above — 1-2-1 — is the disengage string. It is the combo you throw when you have already won the exchange and want to reset to a safe distance without eating a counter on your way out. Throwing a single jab as you step back is often enough to discourage a pursuit, because a missed counter on a retreating opponent is one of the most punished mistakes in the game.
Where Straight Punch Bouts Go Wrong
-
Throwing strings longer than three punches — the stamina pool punishes anything past a 1-2-3, and most players report that four-punch strings only land cleanly against AI in practice mode.
-
Starting with a cross — the cross is the harder punch, and using it as a range-finder burns stamina before the real fight has started.
-
Holding forward while throwing a string — forward momentum turns a clean 1-2 into a clinch, and there is no published clinch mechanic in the official description, so the game simply absorbs the inputs and you lose a counter opportunity.
Guard Stance: High Guard vs Low Guard
The official description names two guard types: a head guard and a body guard, and the choice between them is the second-biggest decision you make every round after picking which straight punch to throw. A boxing guard stance is not just about covering your face; it is the foundation that lets the straight punch travel cleanly back to your chin, because every punch that leaves your fist has to come home, and a sloppy home is a counter waiting to happen.
High Guard Setup
The high guard keeps both hands close to the temples, elbows tucked, and chin tucked behind the lead shoulder. It is the default stance most players adopt because it covers the head — which is the target the game rewards with knockouts, per the official description. The high guard is best when you are facing an opponent who throws lots of straight punches, because the high guard naturally blocks the line of attack that those straight punches travel on.
| Attribute | High Guard | Low Guard |
|---|---|---|
| Protects | Head, chin, jaw | Body, ribs, floating ribs |
| Exposes | Body, particularly the ribs | Head, chin, jaw |
| Best Against | Straight punches, hooks to the head | Body shots, opponents who mix levels |
| Counter Window | Slightly delayed — hands must travel down to counter | Faster — guard is already near the body's center line |
| Stamina Cost | Low | Low |
The trade-off is that a high guard leaves the body open, and any opponent who notices you only defend the head will start working the ribs. The counter to that pressure is to recognize the body shot early and slip outside the line of the incoming punch, then throw a straight punch back down the pipe. The mechanics page on the site breaks this pattern in more detail if you want to dig into the guard mechanic specifics.
Low Guard Setup
The low guard drops both hands closer to the body, typically at chest or rib height, and is the right answer when an opponent is committed to body work. The low guard also opens a faster counter window to body shots because the hands are already in position to redirect the incoming punch upward. The risk is obvious: the chin is exposed, and one clean straight punch that finds the head against a low guard is often round-ending.
Choosing Your Guard Per Matchup
The best boxing guard stance in this game is the one you can switch between without thinking. Players who commit to only one guard eventually get read, because every player has a tell for the punch they are about to throw, and a fixed guard telegraphs your defense. The simplest rule of thumb: start the round in a high guard because most opponents open with head-targeted straight punches, and switch to a low guard the moment your opponent commits a body shot or drops their own level to attack underneath.
Footwork Drills for the Straight Punch
A straight punch only lands if your feet are in the right place when your hand arrives. The game's first-person camera makes footwork feel like aim, but it is the same split-step and weight-transfer pattern that real boxers use, just compressed into a forward-facing view. These footwork drills are the ones players report as the most effective for keeping the jab and cross on target.
Drill 1: The Range-Finding Step
Stand at a distance where your jab just barely reaches with a full extension, then take one small step forward and try to land the same jab without leaning. If the jab lands without you adjusting your arm, your step was the right size. If you have to reach, you stepped too short. If you walk into the opponent's space, you stepped too far. Repeat for sixty seconds, alternating jab and cross. This drill is the foundation that every other footwork pattern in the game builds on, because it teaches the exact distance at which a straight punch becomes a counter opportunity.
Drill 2: The Slip-and-Cross Pivot
Start in a balanced stance, slip your head off the center line as if reacting to an incoming jab, and immediately throw a rear-hand cross while pivoting on your front foot. The pivot is what puts your body weight behind the straight punch, and without it the cross only pushes the opponent back rather than scoring a clean hit. Practice this in slow motion first, then speed up once the foot and hand fire on the same beat.
Drill 3: The Reset Step
After every thrown string, take one small step back to the same range you started from. This is the drill most players skip, and it is the one that wins the most rounds. The reset step turns a 1-2 into a safe exchange rather than a commitment, and it gives the stamina pool a beat to recover between strings. The ring-side combat guide on the site has a longer breakdown of how reset steps interact with match pacing if you want to see this in a full-fight context.
Drill 4: Angle Step
Instead of stepping straight back after a string, step at a 45-degree angle off the center line. The angle step accomplishes two things: it takes your head off the line of your opponent's counter, and it sets up a straight punch from a new angle on the next exchange. A jab thrown from a 45-degree angle is much harder to read than one thrown straight on, because the timing of the foot landing and the fist arriving is slightly different from what the opponent has practiced defending.
Putting the Drills Together
The four drills above are designed to be run in order. The range-finding step teaches distance, the slip-and-cross pivot teaches counter timing, the reset step teaches pacing, and the angle step teaches misdirection. Players who run all four for two to three minutes before queuing for a match consistently report cleaner straight punch accuracy in the first round, when most opponents are still finding their own range. The mobile touch controls reference is worth bookmarking if you play on a phone, because the footwork drills translate directly to thumbstick movement but the inputs for punches and guards are arranged differently than on a gamepad.
Common Pitfalls and How to Fix Them
Even with a clean guard and disciplined footwork, there are a few mistakes that show up again and again in player reports. None of them are about the straight punch itself — they are all about what surrounds it.
The mechanics of timing, range, and straight-punch delivery are examined in detail in the official First Person Boxing experience, where players can practice jab and cross execution against moving opponents (according to the First Person Boxing experience).
Pitfall 1: Throwing the Straight Punch While Backpedaling
A straight punch needs your weight moving forward to land cleanly, and throwing it while stepping backward turns the punch into a push. The fix is mechanical: stop the backstep for one beat, plant the feet, and throw. The reset step drill above is the practice that makes this feel natural rather than forced.
Pitfall 2: Holding the Guard Too Wide
A guard held out to the sides, away from the center line, looks like a defensive position but it is actually an open one. The opponent's straight punch travels through the gap between your hands and your head. The fix is to bring the hands in tight — the high guard section above has the geometry — and to keep the elbows tucked. The defense and dodge guide covers a wider set of defensive options, but the tight guard is the one that fixes the wide-guard problem specifically.
Pitfall 3: Ignoring the Stamina Pool
The official description explicitly names the stamina pool as a mechanic that slows you down when it empties. Players who throw long strings without pacing drain that pool, and once it empties, the straight punch itself slows down. The fix is to think of every string as a question you are asking the stamina pool: "Can you afford this?" If the answer is no, throw a single jab and reset.
Pitfall 4: Forgetting the Counter
The straight punch is the most common counter tool in the game, but only if you are watching for the opening. Players who throw the straight punch on offense but never on defense end up in long exchanges where both fighters are throwing first. The fix is to deliberately practice the slip-and-cross pivot drill above until the counter becomes reflex.
Frequently Asked Questions
What makes the boxing straight punch different from hooks and uppercuts in First Person Boxing?
The straight punch travels along the shortest line between your fist and the opponent, which makes it the fastest and most stamina-efficient punch in the game's official five-mechanic list. Hooks and uppercut-style swings have their uses, but they require openings the straight punch itself creates, which is why every reliable combo in the game starts with a jab or a cross.
How do I build a reliable straight punch combo as a new player?
Start with the 1-2 (jab-cross) and only add a third punch after the 1-2 lands cleanly ten times in a row. Once that string is automatic, layer in the 1-1-2 to break opponents who try to parry the first jab, then the 2-1-2 as a counter after a slip. Longer strings are not necessary at any level, and the stamina pool will punish you for trying them.
Should I use a high guard or a low guard with the straight punch?
Start every round in a high guard because most opponents open with head-targeted straight punches, and switch to a low guard the moment they commit to body work. The straight punch itself works from both guards, but the high guard gives a cleaner path back to your chin after every thrown punch, which is what keeps the counter window small.
How often should I practice footwork drills for the straight punch?
Two to three minutes of focused footwork before a play session is enough to see a measurable improvement in straight punch accuracy, according to community testing. The four drills in the footwork section above — range-finding step, slip-and-cross pivot, reset step, and angle step — cover the full set of positions a straight punch needs to land from.
Does the straight punch cost more stamina than other punches in First Person Boxing?
The straight punch is actually the most stamina-efficient offensive tool because the jab costs less than any other punch in the game and the cross, while heavier, still costs less than long swinging punches that miss. The stamina pool becomes a problem only when players throw long strings or stack crosses without jab setups, which is a pacing issue rather than a cost issue.