
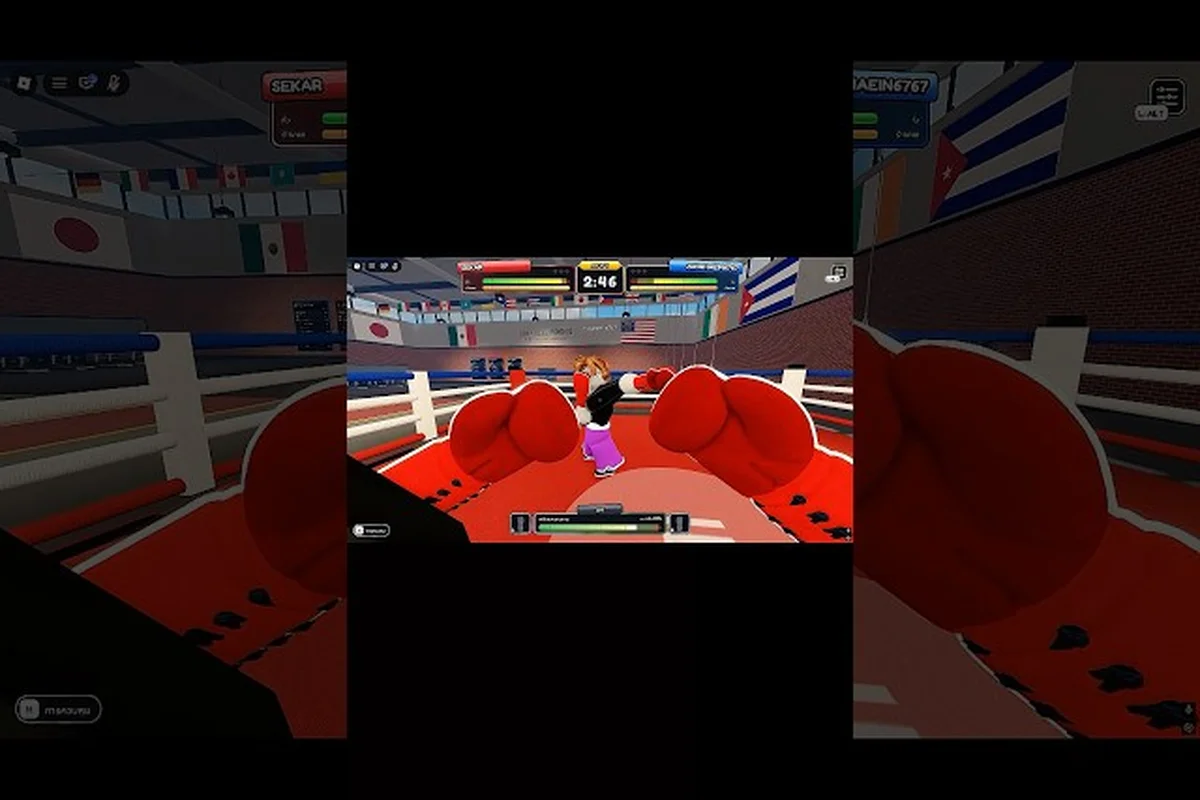
The stamina bar in First Person Boxing is the invisible engine behind every match, because it decides when your punches land clean, when your opponent's guard cracks open, and when the next cinematic knockdown is about to land. Mastering the rhythm of drain and recovery is the difference between a flat decision loss and a third-round stoppage, and this guide breaks down exactly how the system behaves so you can plan every exchange around the numbers that matter.
What the Stamina Bar Actually Does
According to the official game description, First Person Boxing features a stamina pool that slows you down when you get tired. That single line from the developer is doing a lot of work, because stamina is the connecting tissue between punches, slips, guards, and the cinematic knockdowns the game is known for. Every action you take in the ring draws from the same pool, and the order in which you spend it determines the shape of the round.
| Stigma Event | Effect on the Stamina Bar | Visible Consequence |
|---|---|---|
| Throwing a heavy punch (hook, uppercut) | Large chunk drained from the stamina bar | Slower hand speed on the next swing, longer recovery frames |
| Throwing a jab / straight | Small chunk drained | Quicker recovery, faster follow-up input |
| Holding the head guard input | Steady medium drain | Punches absorbed at the cost of gas |
| Holding the body guard input | Steady medium drain (different zone) | Body shots absorbed, leaves head exposed |
| Slipping a punch (slip input) | Small burst drain, then passive recovery | Avoids damage without a guard window |
| Countering while the opponent commits | Variable cost, high payoff | Can produce a first person boxing knockout mechanic chain |
| Doing nothing (resetting) | Passive recovery climbs the bar back up | Hands return to top speed |
The stamina bar is not a separate meter you watch like a health globe — it is a shared resource that quietly reshapes the speed and reliability of every other system in the match. Once you start tracking the small dips during jab exchanges, the larger dips after hooks, and the slow climb back during a reset, the entire ring becomes a question of timing rather than reflexes alone.
Players quickly notice that the stamina system in this game is designed to reward patience. Community reports suggest the developer tuned it so that spamming heavy swings empties the bar faster than the opponent can drain theirs through guard pressure, which is why ranked mode matches tend to feel like chess games rather than brawls. The first person boxing stamina bar behaves more like a clock than a fuel gauge: every action eats seconds off it, and the fighter who manages the clock usually wins the round.
The Knockdown Window and KO Chain
The first person boxing knockdown mechanic is the dramatic payoff of a well-spent stamina bar. When one fighter's bar drops low after throwing a big swing, the other player gets a brief window to land a clean, committed punch that triggers the game's signature cinematic knockdown. The official description specifically calls out both the cinematic knockdown and the ability of counters to produce a knockout, so the chain is intentional: stamina drain → a clean committed shot → cinematic knockdown → replay. If you want to see how that replay-to-read rhythm translates to a first-person controller, our guide on how first-person boxing controls the camera through a knockdown breaks down the same hit-and-recover loop from the player's POV.
How the Knockdown Chain Flows
| Stage | Stamina State | What Happens On Screen | Player Choice |
|---|---|---|---|
| 1. Opponent throws heavy | Opponent's bar is low | Swing connects or misses, but the opponent is sluggish | Step in with a committed counter |
| 2. Counter lands clean | Defender's bar still healthy | A clean counter can produce a knockout | Follow up with a body or head punch |
| 3. Knockdown lands | Both bars near equal | The opponent drops, the camera reframes | Wait for the count, or chase the finish |
| 4. Cinematic replays the knockdown | N/A | The first person boxing replay feature plays the finish in slow motion | Mental reset, prepare for the next round |
What makes this chain feel different from a generic fighting game is the way the replay system honors it. The first person boxing replay feature does not just show a clip after the match ends — it triggers immediately after a knockdown, giving the winning player a brief moment to absorb the moment while the loser is locked in a recovery animation. According to community testing, knockdowns recovered in the middle of a round also replay instantly, which means the cinematic knockdown is not reserved for final-round finishes.
Players who understand the chain learn to bait the heavy swing rather than force one of their own. Instead of emptying their own bar trying to land the first big shot, they wait for the opponent to commit, slip or guard the blow, and then step in with a clean counter that the system treats as a guaranteed knockdown. The first person boxing counter mechanic is the entry point, but it is the stamina economy that decides whether you actually get to use it.
Head Guard vs Body Guard: Drain Patterns and Tradeoffs
The official description breaks guards into two distinct inputs: head guard and body guard. Both drain the stamina bar, but they protect different zones, and choosing the wrong one against an opponent who switches levels is one of the fastest ways to lose a round. The first person boxing head guard and first person boxing body guard are not interchangeable shields — they are two tools with overlapping costs and very different consequences.
| Guard Type | Zone Protected | Stamina Cost | Best Used Against | Risk If Held Too Long |
|---|---|---|---|---|
| Head guard | Punches aimed at the head and face | Medium, steady drain | Straight punches, jabs, hooks up top | Lowers the bar faster than body guard; leaves the body open |
| Body guard | Punches aimed at the torso and ribs | Medium, steady drain | Hooks to the liver, shovel punches, body crosses | Leaves the head exposed, so a level switch often lands clean |
| Block input (general) | Both zones partially | Lower per-hit cost, less effective | Mixed combinations you cannot read in time | Does not fully absorb either zone |
| Slip | No stamina cost once executed | One-time small burst | Single committed swings (jab, cross) | Misses the counter window if the opponent held the punch back |
A common mistake new players make is holding head guard for the entire round. Because the stamina bar drains steadily while the guard is held, the guarder often runs out of gas before the round ends, at which point the opponent can switch to body shots and the guarder can no longer react. The fix is to alternate: read the level, hold the matching guard for the duration of the exchange, then release and reset so the bar starts recovering.
Community reports suggest that body guard is the safer default at long range, where most opponents throw straights to the head, while head guard becomes the better choice inside the pocket, where hooks and uppercuts are more common. The exact drain rates are not published, so treat these as type-level patterns from observed play rather than official numbers. The first person boxing guard mechanic is fundamentally about choosing the right level at the right time, and the stamina bar punishes indecision in both directions.
Timing the Stamina Bar Through a Full Round
A match in First Person Boxing typically unfolds across three rounds, and the stamina bar behaves differently in each phase. Early rounds reward patience and information gathering. Middle rounds are where the first person boxing stamina system reveals its teeth, because both fighters have spent enough actions that the bar is rarely full. Late rounds become a test of who managed their gas better, and that is when knockdowns and replays tend to cluster.
Round-by-Round Stamina Plan
| Round | Typical Stamina Bar State | Recommended Strategy | What to Avoid |
|---|---|---|---|
| Round 1 | Both bars near full | Throw jabs, read the opponent's level preferences, test guard timing | Throwing multiple hooks in a row (drains the bar before round 2) |
| Round 2 | Both bars at 60–80% | Mix levels, bait heavy swings, set up the first knockdown | Holding one guard all round (steady drain compounds) |
| Round 3 | Both bars at 30–60% | Commit to finishers when the opponent's bar is low; chain counters | Emptying your own bar first and leaving yourself open to a clean counter |
The reason the third round is the most dangerous is that the first person boxing knockdown mechanic is much easier to trigger when both fighters are already gassed. A committed hook at 30% stamina is a serious commitment, and the defender who still has 60% in the tank can punish it cleanly. Players who track their own bar through muscle memory tend to win the late rounds, because they only commit to the big swing when they are sure the opponent has less left.
A second pattern reported by community testing is that the stamina bar recovers faster during a knockdown count than during a normal reset. The standing fighter is essentially idle for several seconds while the cinematic plays, and the first person boxing replay feature locks the camera, both of which give the standing fighter free recovery time. That makes chasing a knockdown immediately after a knockdown a high-reward play, because the chaser can spend stamina on the next swing while the defender is still recovering from the previous one.
Common Stamina Mistakes and How to Fix Them
Most players who feel like the stamina system is unfair are making one of a handful of recurring mistakes. None of them are obvious from the in-game feedback, because the stamina bar is mostly an internal resource rather than a flashy HUD element, but each one has a clear fix once you recognize the pattern.
| Mistake | Why It Drains the Bar | Fix |
|---|---|---|
| Throwing three hooks in a row | Each hook is a heavy stamina cost with a short recovery | Use a hook, then a jab, then reset; alternate between heavy and light |
| Holding head guard the entire round | Continuous steady drain with no recovery window | Release guard between exchanges; only re-engage when you read the level |
| Chasing a knockdown too early | The opponent still has stamina to counter cleanly | Wait for the opponent's bar to dip visibly (slower swing speed) before committing |
| Ignoring body shots | The opponent reads your head guard and switches levels | Mix your offense: jab to the head, hook to the body, straight down the middle |
| Pressing buttons during a replay | Wastes stamina on animations the system does not reward | Stand still during the first person boxing replay feature, then reset |
Fixing the hook-spam habit alone is often enough to climb out of a losing streak. The first person boxing stamina system is built around the assumption that players will mix their offense, and the moment you start throwing one heavy swing for every two or three light jabs, the bar behaves more predictably. The same is true of guard discipline: releasing the guard between exchanges feels like losing protection, but it is the only way the bar can climb back to a safe level before the next big swing.
A second fix is to stop chasing cinematic knockdowns when the round is still early. The replay feature is exciting, but chasing it before the opponent's bar is low usually results in a counter knockdown instead. Save the heavy commitment for round 3, when the stamina economy of both fighters is already stretched, and the first person boxing knockout mechanic is much more likely to land cleanly.
Frequently Asked Questions
What does the first person boxing stamina bar do?
The stamina bar is a shared pool that powers every action in the ring. According to the official game description, it slows you down when it empties, which means heavy punches, guard holds, and slip inputs all cost gas. Managing the bar decides whether your later swings land fast or get countered.
How does the knockdown mechanic work?
When one fighter throws a heavy swing that empties their bar, the other player gets a short window to land a clean committed punch. The first person boxing knockdown plays out with a replay in slow motion using the in-game cinematic camera, and the window before it is where a committed follow-up lands.
Can you get a guaranteed knockout from a counter?
Counters are the cleanest path to the first person boxing knockout mechanic, but they are not automatic. You need the opponent to commit to a heavy swing first, then step in with a clean counter while your stamina bar still has enough gas to follow up. The cinematic replay plays whether the knockdown is the final blow or a mid-round reset.
When should I use the head guard versus the body guard?
Use head guard when you read a level switch to the top (jabs, hooks up top) and body guard when you read punches aimed at the ribs and torso. The stamina drain is similar for both, so the cost is about choosing the right level rather than picking the cheaper option. Holding either guard all round will drain the bar faster than mixing them.
Does the stamina bar recover during a knockdown replay?
Community testing suggests the standing fighter recovers stamina while the replay plays, because the system locks the camera and prevents further input. This is one of the best times to reset, since the first person boxing replay feature gives you free recovery time before the next exchange.